by Hannah Sutherland, First year student, MPhil Textile Conservation.
Textile conservation treatments are always a culmination of many steps. Which steps we choose to take, and the order in which they are completed, varies depending on the object, the type of damage and the needs of the client. The first semester of the MPhil Textile Conservation course lays down all the ground work for many of the basic practices. We read a lot of books, we (try to) memorize lots of information and then get to have a run-through of our new skills.
During the second semester we get to bring all these elements together for two “start to finish” projects which aim to develop all the techniques learnt so far and specifically for us to gain experience of wet cleaning and stitched supports . The objects varied across the group and the first object I was given to work on was an 1870’s christening gown belonging to Dumfries Museum (DUMFM:0197.214).
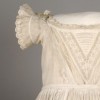
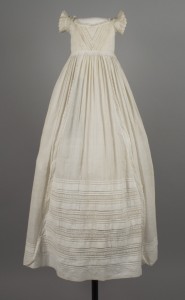
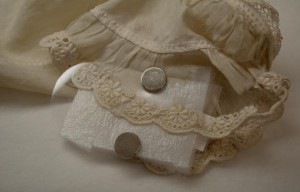
Figures 1 and 2. Front of gown and sleeve detail before treatment. CTC.212 Copyright University of Glasgow/Dumfries Museum.
To begin with the gown was documented and photographed. If we don’t spend proper time just looking at the object issues could be missed or damage incorrectly recorded. Good photography is very important, as down the line it’s the main marker of previous condition…once something is treated you can’t take it back! As the above photographs show one of the key areas of concern was the decorative trim on the sleeves. The density of the stitching created a weak point down the middle of the trim and many areas had simply fallen into two pieces.
All wet cleaning projects require lots of thought into the choice of detergent and how the gown should be washed. There is also a handwritten date inside the bodice and I had to make sure this wouldn’t come out in the water. A conservation grade detergent was used to remove the soiling which came out as yellow in one bath and grey in another. The yellow soiling is linked to the degradation of cellulose (cotton), whereas the grey soiling was carbon.
It took a 3 baths of detergent and several rinses with water to clean the gown. Washing helps to remove creases as well as dirt; as water enters the fibres they expand and some tough creases can be relaxed back into shape. In order not to regain any creases the gown was dried over a net crinoline.
Figure 3. Sponging when wet cleaning helps to push detergent into the object and pull up dirt – it can create a lot of bubbles though! Copyright University of Glasgow/Dumfries Museum.
Figure 4. Detail during humidification treatment to relax twists in trim stitching. CTC 212. Copyright University of Glasgow/Dumfries Museum
When the gown was clean and dry I began taking steps to support what remained of the sleeve trim. Once all the trim had been flattened out I was able to stitch loose areas back in place. Each sleeve was mounted on a separate inner-sleeve support which had been specially dyed to match and hemmed with a scallop to follow the original. Other areas were also supported and protected with an overlay of dyed monofilament nylon net.
Conservation stitching has many similarities to the stitching used to make or decorate garments. The key differences can show up in the materials used to stitch with and the importance we place on positioning stitches relative to the stitches already present. In preparation for this project I tried to do some reading around how decisions are made regarding placement of stitches. Most articles discussing any treatment will mention stitching but I struggled to find any which gave an in-depth description of why certain stitches were used in a given situation – perhaps simply because stitching is such a common technique for textile conservators. For these sleeves I used a combination of whip stitches, tacking stitching, laid couching, herringbone and running stitch. Each stitch has a different function – the tacking stitches, worked through the holes of the broiderie anglise, held the support in place whilst it was being stitched; the running stitch was used to secure net over very weakened and frayed areas, whilst the laid couching holds the trim to the support fabric. I also pre-stitched a machine zig-zig onto the scalloped hem of my support fabric. Although I now feel more confident about stitching decisions, I am always on the lookout for articles giving a more in-depth analysis of stitched supports and the potential for stitches to be used in alternative ways.
Although the gown took several weeks work to complete, I am very pleased with the outcome – there’s something very satisfying about working a project through from start to finish.

 Figures 5 and 6. Front of gown and detail of sleeve after treatment. CTC 212. Copyright University of Glasgow/Dumfries Museum


