by Maria Grabowska, Second Year Student.
The Principles and Practice courses run through each semester of the first and second year and aim to develop the core techniques of interventive and preventive conservation. In the second term of the second year there are no more science lectures or theoretical classes in this course, just a massive emphasis on practical skills and object treatment. The first object is complex and demands the application of all the skills and knowledge gained so far – a challenge…, but in a good way!
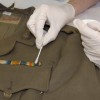
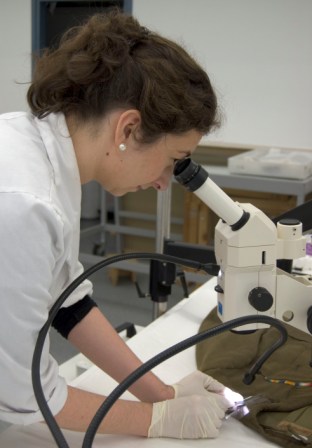
For me this project came from Dumfries Museum; a World War 1 military jacket required for display next year. Made from green wool, lined with cotton, decorated with silk, brass buttons and insignia it is an interesting case of a mixed media object. The jacket was very soiled due to use and being unprotected from dust and dirt for many years. Additionally, it had suffered an invasion of moths at some point resulting in numerous holes in the wool layer. I knew from the beginning that the treatment would primarily focus on cleaning partly because the dirt might accelerate further damage, but also because improving the aesthetics of the jacket was a significant factor to the client.
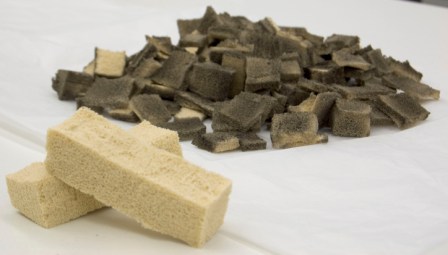
The first step was to surface clean the jacket, which involved working with low-powered vacuum suction, as well to use a cleaning sponge made from vulcanised rubber. The open cell structure of the sponge was very effective at absorbing the soiling, producing an impressive pile of filthy scraps.
Due to the mixed media elements and the character of dirt accumulated on the jacket I was inclined to solvent clean. Health and Safety implications meant I could not undertake it in the Centre therefore I searched for different options. Upon discussion with my supervisor, Karen Thompson, we decided to contact professional dry-cleaners who have a well-established relationship with local museums.
There is a lot to think about it when commercial dry cleaning is to be involved. The garment needs to be tested for dye bleeding and protected thoroughly. Each metal element has to be isolated by multiple layers of fabric and padding to ensure no abrasion will occur to their surface. Cushioning the buttons also keeps the fabric itself safe from possible harm caused by agitation. The object needs to be stuffed with light fabric (e.g. net) to make it more robust. Lastly the item is confined into a netted bag and stitched closed so any possible movement is prevented. All these preparations took me all day and I even needed an extra pair of hands in last couple of hours.

The dry cleaning went smoothly. The manager took time to explain the procedure, answer all my questions, modify the cycle according to our wishes and suggest best solutions with her knowledge, which was extensive! I am glad to report all the preparations were worthwhile since the jacket did not suffer any damage. The cleaning was very successful at removing the soiling and the jacket now feels and looks much better much.
The next stage will involve stabilising all the areas of loss caused by moths with colour-matched fabric and appropriate stitching techniques, which I expect to complete in a few weeks. And if time allows I hope to mount it onto mannequin, which is always a great and satisfying job.